|
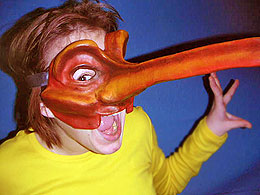
Full or half masks, open or covered, animal masks, character masks,
Commedia dell’Arte masks, Zero masks, neutral masks, masks for
theatre training, for rehearsals, to hang on a wall or masks for a specific
performance – we can make most kind of masks, for most occasions.
I always work in papier-mâché. |
 |
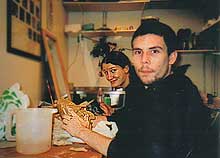
This
workshop is extremely flexible. I can either continue through
the whole course to help when the participants make their masks
and help to plan, give shape to or design the masks or I can just
come in as a consultant every now and then to help the group in
its work. We can also make different kinds of masks in different
styles, for example start with a set of Commedia dell’Arte
masks. Naturally It depends on the participants own preparations,
previous knowledge, interest and ambitions how comprehensive the
workshop will be.
We also have the possibility to work with different types of masks,
but for material we always use papier-mâché, since
it is the easiest technique and demands the of least space, tools,
material and so on. On |
|
the other hand
we can use papier-mâché as a foundation and go further
and add other materials such as hair or fur, glass or plastic details,
leather or cloth and so on etc.
The workshop
can be adapted, but I want to explain a sort of standard process in
short to make clear how the workshop is done.
We start by a going through the different kinds of masks and how they
are used, what is important in each mask and some easy mask techniques.
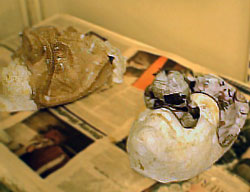
Then we start by making a plaster mask on each participant, either
just in the face or over the whole head. Then we strengthen that mask
and use it as a mould to cast a positive of each participants face
or head
|
The
positive is now used to put clay on and model the mask we want.
On this we now lay a number of layers of papier-mâché.
When the papier-mâché has dried it is time to take
out the clay and to take out and clean the mask. The mask shall
now be ”framed” with paper to protect it and to put
on an elastic band. Now it is time for the participants to get
the “homework” to take home the mask and sand it until
it is smooth and even.
After that we paint the mask, first inside with enamel paint,
then on the outside. Depending on style, context and taste we
can choose what kind of colour and techniques we want to use when
painting. Finally it is time to add decorations as hair, teeth,
eyes or what is suited, but also to make filling inside the mask
to make it more comfortable to wear . |
 |
|
Each
participant shall have the knowledge to be able to construct and design
their own masks after the workshop. They shall also have enough understanding
of mask making to be able to develop their mask making. Furthermore
each participant shall receive at least one mask and their own plaster
positive, to continue working from, after the conclusion of the workshop. |
Group:
3 – 10 |
3 – 10 persons. |
Space: |
Access
to water is needed. |
Length:
|
By
agreement and depending on content. |
Price:
|
By
agreement. |
Other: |
The
arranger is economically responsible for material and most tools. |
|
|
|